Fix Stuck Faucet Washer: Step-by-Step Guide
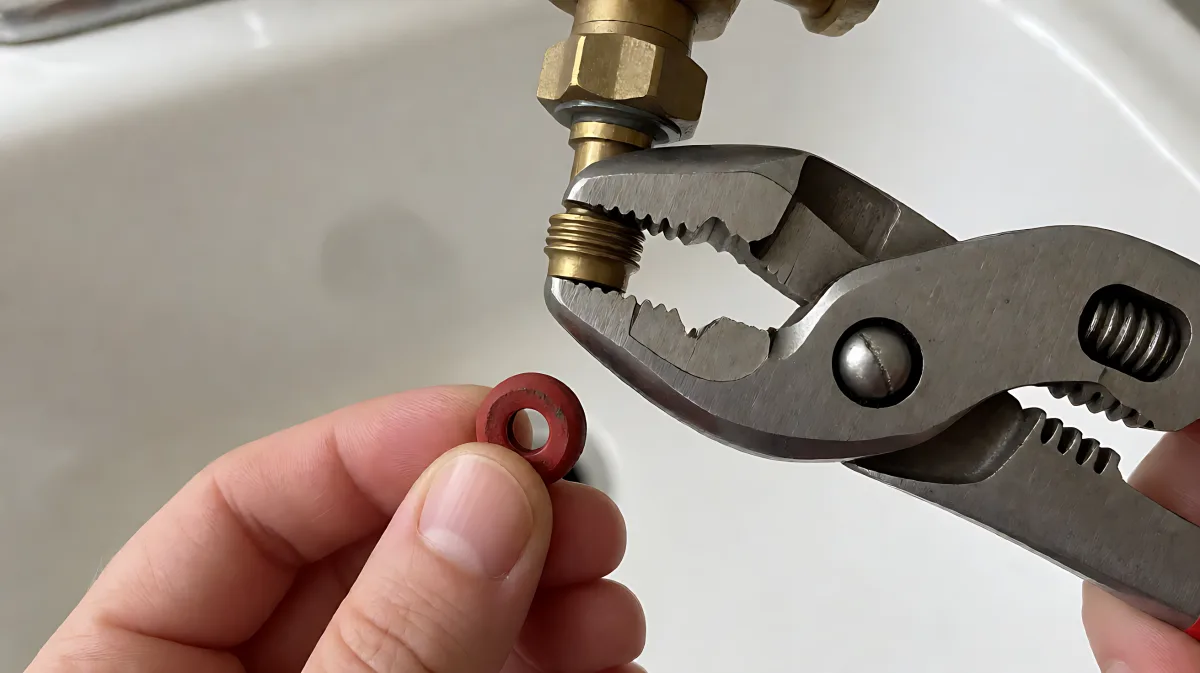
A dripping tap is rarely worth a plumber's bill. Here is how to free a stuck valve stem, source the correct washer size, and stop the leak permanently in one evening.
Fixing a stuck faucet washer is a straightforward repair that usually takes less than 15 minutes and costs only a few dollars in parts. By shuttling off the water supply, applying penetrating oil to seized components, and replacing the worn rubber seal, you can stop drips without calling a professional plumber. Most compression faucets use flat washers between 9/16 inch and 3/4 inch in outside diameter, so measuring your old part before shopping ensures a perfect fit.
Why Is My Faucet Hard to Unscrew?
When a tap becomes difficult to open, the issue is rarely the handle itself but rather the internal valve stem or packing nut. Over time, mineral deposits from hard water and residual rubber compounds accumulate on the threads, effectively gluing the parts together. If your faucet is seized, you need to break the corrosion bond before you can access the washer.
Many homeowners assume that forcing the handle or using excessive torque with a wrench will solve the problem, but in fact, this often strips the paint or damages the brass fittings. Instead, you should apply a penetrating oil, such as PB Blaster or a standard WD-40 alternative, directly to the threads. Let it sit for at least 30 minutes to allow the solvent to work its way into the metal. For truly stuck components, wrapping a cloth around the nut and tapping it gently with two hammers can help vibrate the rust and loosen the joint.
What Tools Do I Need to Free a Stuck Valve?
You do not need expensive specialty equipment for this task. A standard adjustable wrench or a pair of slip-joint pliers is sufficient for most residential faucets. If the nut is rounded or deformed, you may need needle-nose pliers to get a grip. Additionally, keep a flathead screwdriver handy for prying off decorative caps and removing the washer once the stem is out.
How Do I Replace the Faucet Washer Step-by-Step?
Once the valve stem is free, the process is mechanical and straightforward. Follow this checklist to ensure you do not lose small components down the drain:
- Turn off both hot and cold shut-off valves under the sink. If these are missing or broken, shut off the main house supply.
- Open the faucet to drain any remaining pressure and water in the lines.
- Place a rag or towel over the drain to catch screws and small parts.
- Pry off the decorative cap on the handle to expose the retaining screw.
- Remove the screw and lift the handle straight off. If it sticks, wiggle it gently rather than forcing it sideways.
- Unscrew the packing nut using your pliers or wrench. If it is still tight, reapply penetrating oil.
- Pull the valve stem assembly out of the faucet body.
At the bottom of the stem, you will find the old washer held by a single brass screw. Use pliers to remove this screw carefully. If the screw head is stripped, you may need to grip it with needle-nose pliers or, in extreme cases, drill it out slowly. Once the old washer is out, inspect the brass seat under it. If the seat is pitted or scored, the new washer will not seal properly, so you may need to use a seat-dressing tool to smooth the surface.
How Do I Choose the Right Washer Size?
Matching the size is critical for a leak-free seal. You must measure the outside diameter (OD), inside diameter (ID), and thickness of the old washer. Most standard faucet washers fall within specific ranges, but variations by brand exist.
| Washer Dimension | Common Sizes |
|---|---|
| Outside Diameter | 9/16" to 3/4" |
| Inside Diameter | 1/2" to 5/8" |
| Thickness | 1/16" to 3/16" |
For hot water lines, natural rubber washers tend to harden and degrade faster. In these cases, choose an EPDM or silicone washer for better heat resistance and longevity. When installing the new washer, press it into the stem's cup so it sits flush without folding at the edges. Reinstall the retaining screw snugly, but do not overtighten, as this can crush the rubber and cause the next leak.
What If the Faucet Still Drips After the Repair?
If you have replaced the washer and the tap is still dripping, the problem is likely the valve seat. A rough or damaged seat will chew up the new washer quickly. A $10 seat-dressing tool can resurface the brass seat, or you can replace the seat entirely with a seat wrench if it is heavily damaged. After addressing the seat, install one more fresh washer to ensure a proper seal.
Finally, reassemble the faucet in reverse order. Thread the stem back in, tighten the packing nut until it is snug, and reattach the handle. Turn the water back on slowly to avoid a pressure spike. Run the faucet, then shut it off and watch the spout for 60 seconds. If there is no drip, your repair is complete.
Frequently Asked Questions
Can I use any rubber washer in a faucet?
No. You must use a flat washer that matches the specific dimensions of your valve stem. Using a washer that is too thick will not allow the stem to close fully, while one that is too thin will not seal. For hot water, use heat-resistant materials like EPDM or silicone.
How much force should I use when tightening the packing nut?
Tighten the packing nut until it is snug, but avoid "gorilla-tight" pressure. Overtightening can deform the stem or crack the faucet body. The goal is to secure the stem without pinching the packing material excessively.
Is it cheaper to replace the whole faucet?
For older compression faucets, replacing the entire unit can sometimes be cheaper than sourcing individual washers and seats, especially if the fittings are corroded. However, a washer replacement usually costs under $10 and takes 15 minutes, making it a viable first attempt.
What if the shutoff valves are broken?
If the local shutoff valves do not work, you must turn off the main water supply to the house. If you cannot access the main valve or are unsure of its location, it is best to call a professional plumber to handle the repair safely.