Grab Bar Installation Guide: Safety, Studs, and Weight Limits
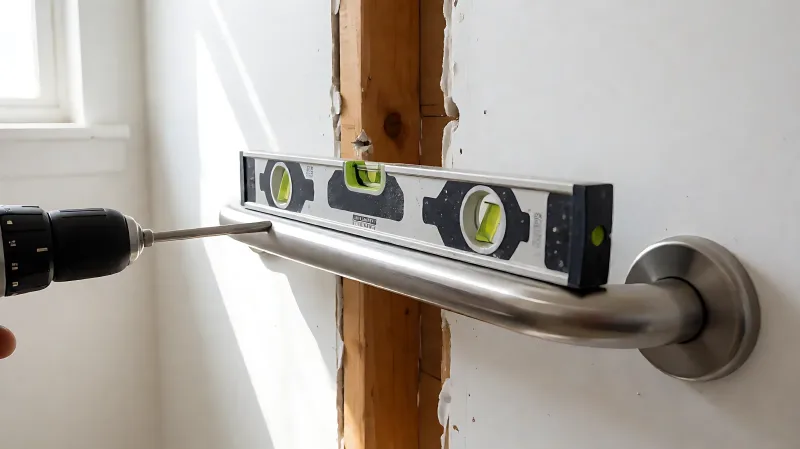
A step-by-step guide to installing bathroom grab bars. Learn how to locate studs, use backing plates for non-stud mounting, and verify load-bearing capacity for maximum safety.
Installing a grab bar correctly requires anchoring it directly into a wall stud or using a structural backing plate for hollow walls. This method supports dynamic loads up to 500 pounds, whereas standard drywall anchors may only hold 80 to 150 pounds. Always verify weight limits and load paths before relying on the bar for fall prevention.
What Are the Weight Limits for Bathroom Grab Bars?
Standard residential grab bars must withstand significant vertical and lateral forces. Professional safety standards, such as those referenced by the American National Standards Institute, often cite a minimum test load of 250 pounds for static weight. However, dynamic forces generated during a fall or sudden shift in balance can be much higher. Manufacturers like Moen Home Care and Delta specify that their load-bearing bars are rated to support up to 500 pounds when properly installed into wood studs. If a user weighs more than 300 pounds or if multiple users might grasp the bar simultaneously, high-capacity stainless steel models with reinforced mounting holes are essential. Never assume a decorative towel bar is suitable; dedicated grab bars have thicker tubes and deeper internal threads to handle shear stress.
How Do You Locate Wall Studs for Secure Mounting?
Wall studs are the vertical wooden or metal framing members that carry the weight of the house. They are the ideal anchor points because they provide solid material for screws to bite into. In standard US residential construction, studs are spaced 16 inches or 24 inches apart on center. You can locate them using a magnetic or electronic stud finder. For critical safety installations, use a screw to verify the solid core. If you cannot hit a stud at your desired height, you must use a backing plate. A common mistake is assuming every bathroom wall has a stud exactly where the bar needs to be. Shallow depths in some vanity-adjacent walls may require bridging plates if no framing member is available.
What Are Backing Plates and When Do You Need Them?
Backing plates, also known as mullion plates or furring strips, are structural reinforcements used when you cannot mount directly into a stud. They are typically 3/4-inch thick oak, pine, or composite boards measuring 16 by 16 inches or larger. The plate is screwed directly into the adjacent studs or masonry, creating a solid surface behind the drywall. You then drill through the drywall into this plate to mount the grab bar. This method is vital for installing vertical bars next to showers where studs are often spaced 24 inches apart, leaving no stud in the exact center. In the UK, similar principles apply to cavity walls, where one may need to install a masonry plug into the solid brick or block layer if the gap allows it, or use a bridging plate spanning between the inner and outer skins of the cavity where structurally sound. Always ensure the backing plate does not interfere with plumbing pipes located behind the wall.
What Are the Correct Heights for Horizontal and Vertical Bars?
Height placement dictates usability and effectiveness. For a horizontal bar beside a toilet, the ADA recommends a mount height of 33 to 36 inches from the finished floor. This allows a user to grip the bar with their elbow straight, reducing shoulder strain when pulling up. For a vertical bar, typically placed at the shower entrance or beside the toilet for additional leverage, the standard height is 56 inches. The distance from the rear wall should be 12 inches to match the toilet bowl position. In the UK, British Standard BS 8300 provides similar guidance, suggesting handrails between 850mm and 950mm for toilet aids. Measuring accurately with a level is crucial. A bar installed even one inch off level can cause the mount to shear over time. Mark your drilling holes with a pencil and verify alignment before committing to the first hole.
How Do You Seal and Finish the Installation for Moisture Resistance?
Bathrooms are high-humidity environments where water can penetrate screw holes and cause drywall to rot or masonry to deteriorate. After inserting the mounting bolts through the grab bar tube, pre-apply a small amount of construction-grade caulk or silicone sealant into the holes on the wall. This creates a moisture barrier that prevents water from wicking into the studs or backing plate. Tighten the set screws on the inside of the tube securely using a hex key or Allen wrench. Do not over-tighten, as this can crack the bar or strip the threads in the wood. Once tight, check the bar for any movement. It should feel rock solid. Finally, run a bead of clear silicone along the outer edge of the mounting hardware to prevent water from accumulating behind the bar during showers.
What Are the Common Mistakes to Avoid When Installing Grab Bars?
The most dangerous error is using standard drywall anchors without a stud or backing plate. Drywall anchors like self-tapping plastic anchors are not designed for fall prevention. They can pull out of the gypsum core under heavy dynamic load, leading to catastrophic failure. Another error is installing into hollow tiles without reaching the substrate. You must drill through the tile into the wall material, not just the ceramic surface. Avoid using suction cup bars for primary support; they are only for temporary, light-duty assistance and lose grip easily on textured or soapy surfaces. Lastly, do not install bars in front of plumbing valves or radiators, as heat can warp materials and block access to emergency shut-offs.
Do You Need a Professional for Grab Bar Installation?
While DIY is feasible for those comfortable with power tools and basic carpentry, professional installation ensures compliance with local building codes and accessibility standards. A pro can perform a structural inspection of the wall to identify hidden pipes or wiring that could be damaged during drilling. They also have the tools to verify load capacity and can install complex L-shaped or diagonal bars that require precise angle calculations. If the wall is masonry brick or stone, a professional will use a masonry drill and appropriate wall plugs, a task that requires specialized equipment to avoid shattering the brick. For elderly users, the safety margin is non-negotiable. A $200 professional installation can prevent a $50,000 medical bill from a hip fracture caused by a failed home install.
How Do You Test a Newly Installed Grab Bar?
After installation, perform a load test. An adult should sit on the bar or lean into it firmly to test lateral and downward strength. The mounting points should not wobble, creak, or show signs of the drywall crumbling around the screws. If you hear any grinding or feel any give, remove the bar, fill the holes with wood filler or patching compound if using drywall anchors, and reinstall into the stud or backing plate. Repeat the test until the bar feels rigid. Regular annual inspections are recommended to check for corrosion, loose set screws, or new hairline cracks in the paint or sealant around the mounts.
What is the difference between a grab bar and a towel bar?
A grab bar is engineered for load-bearing, with a thick outer diameter and internal threads that run the full length of the tube. It is rated to support hundreds of pounds of dynamic force. A towel bar is designed for aesthetics and light weight; it often has a thin outer sleeve, short mounting tabs, and cannot withstand the shear forces of a fall. Never use a towel bar as a substitute for a grab bar.
Can I install a grab bar into a stud behind a shower curtain?
Yes, provided the stud is accessible and not blocked by waterproofing membranes or plumbing. Use a stud finder through the drywall or access panel. Ensure the drill bit is long enough to reach the stud through any tile or backer board. Do not drill blind; you must verify the stud depth and avoid pipes that typically run behind showers.
How much weight can a suction cup grab bar hold?
Suction cup grab bars typically hold between 80 to 150 pounds under static, dry conditions. In a wet, soapy bathroom environment, this capacity drops significantly due to reduced friction. They are strictly for temporary assistance, such as holding a towel or slight stabilization, and are never rated for fall prevention or full body weight support.
What tools do I need to install a grab bar into a stud?
You will need a magnetic or electronic stud finder, a power drill with masonry or wood bits depending on the wall material, a hex key or Allen wrench (usually included with the bar), a level, a pencil, and a tape measure. If using a backing plate, you will also need a drill, screws, and a piece of 3/4-inch hardwood or composite board.
Are there any codes for grab bar installation in UK homes?
UK homes generally follow Part M of the Building Regulations for accessibility, and British Standard BS 8300 provides guidance. While not all installations require a building inspector, following these standards ensures the bar is placed at the correct height (typically 850mm to 950mm for toilet aids) and capable of withstanding the required loads. Masonry walls require specific anchors rather than wood screws.